Key Highlights
- Always inspect your masonry surface for damage like cracked mortar before you begin cleaning.
- Choose the right cleaning method based on your masonry type; the gentlest approach is always best.
- Proper masonry cleaning requires pre-wetting the surface to prevent the cleaning agent from soaking in.
- Use soft-bristle brushes and low-pressure rinsing to avoid harming the masonry.
- The best methods for the removal of stains often involve specialized cleaners designed for specific materials.
- Prioritizing safety with protective gear is a non-negotiable part of any cleaning project.
Introduction
Over time, dirt, grime, and environmental pollutants can hide the natural appeal of your home’s brick or stone. Proper masonry cleaning is more than just washing a wall; it’s a careful process to restore and preserve its condition. The right techniques can safely remove contaminants from the masonry surface, revealing the true beauty of the masonry without causing harm. This guide will walk you through the essential steps and methods for maintaining your home’s attractive appearance for years to come.
Essential Masonry Cleaning Techniques Every Homeowner Should Know
Effective masonry cleaning involves a series of steps that protect your brick or stone while achieving a fresh look. From general cleaning with simple tools to using specific masonry cleaning products, the right approach depends on the type of dirt and the surface itself. Knowing the best methods ensures you get great results without unintended damage.
Choosing the correct cleaning method is crucial for success. Whether you are dealing with everyday dirt or tougher stains, understanding these techniques will help you make informed decisions. We will explore everything from initial inspection to the final rinse.
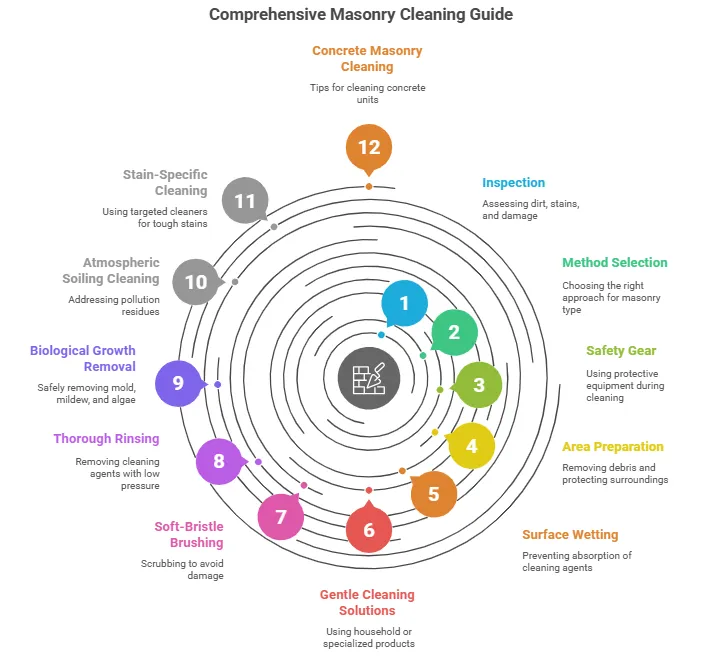
1. Inspecting Masonry for Dirt, Stains, and Damage Before Cleaning
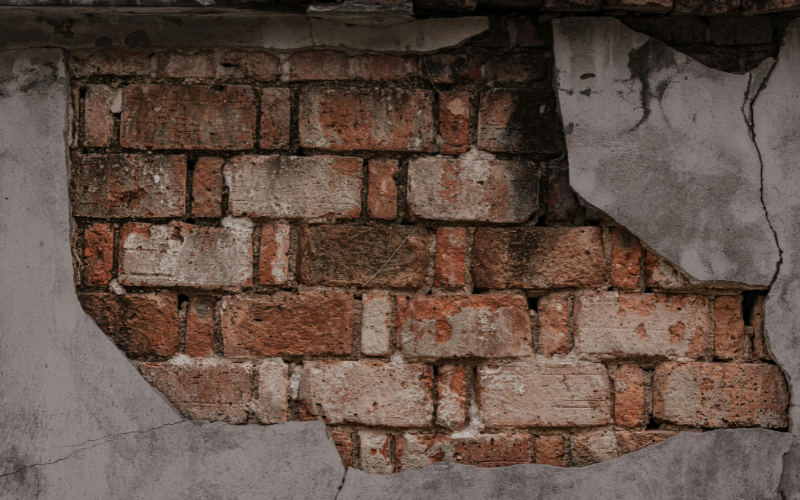
Before you mix any cleaners or turn on a hose, take a close look at the entire masonry surface. This inspection is the most critical step in the entire process. Look for any signs of damage, such as cracks, loose bricks, or crumbling mortar joints. Cleaning can worsen these issues, so it is vital to identify and repair them first. If you find significant damage, it is wise to consult a professional Masonry Contractor.
Next, identify the types of soiling you need to address. Are you dealing with simple dirt, green or black biological growth, or specific spots from rust or paint? Understanding the nature of the contamination helps you choose the most effective and safest plan for the removal of stains.
A thorough initial check prevents you from accidentally damaging your home. taking the time to assess the condition of your masonry, you set yourself up for a successful cleaning project that enhances your home’s appearance instead of creating new problems.
2. Choosing the Right Cleaning Method for Your Masonry Type
Not all masonry is the same, and the cleaning method you choose should match the material. The kind of surface you have—be it conventional brick, natural stone surfaces, or an architectural concrete building—will determine the best approach. Some materials are softer and more porous than others, making them vulnerable to aggressive cleaning techniques.
Always start with the gentlest cleaning method that will get the job done. This might be simple hand-scrubbing with a brush and water. For other situations, you may need a specific cleaning agent. Pressure washing can be effective, but it must be done with caution and at a low setting to prevent damage.
It is always a good idea to test your chosen cleaning method on a small, hidden area of the wall first. This allows you to see how the masonry reacts before you commit to cleaning the entire surface. This small test can save you from causing irreversible damage or discoloration.
3. Using Proper Safety Gear and Precautions During Cleaning
Your safety is the top priority during any home improvement project, and masonry cleaning is no exception. Cleaning agents can splash, and debris can fly, so taking the right safety precautions is essential. Always wear the appropriate personal protective equipment (PPE) from start to finish.
This gear protects your skin, eyes, and lungs from potentially harmful chemicals and particles. Before you begin, make sure you have everything you need on hand. Essential personal protective equipment includes:
- Safety glasses or goggles to shield your eyes from splashes.
- Waterproof gloves to protect your hands from cleaning solutions.
- Long-sleeved protective clothing and pants to cover your skin.
- A respirator if you are working with strong chemicals or creating dust.
Following these safety precautions helps ensure your cleaning project goes smoothly and without injury. Always read and follow the safety recommendations provided by the manufacturer of any cleaning products you use.
4. Preparing the Area by Removing Debris and Protecting Surroundings
A professional-looking result starts with proper preparation of the work area. Before you apply any water or cleaners, clear away any loose debris from the wall with a brush. This step prevents you from grinding dirt into the surface. At Ramos Masonry, our customer service approach always begins with meticulous prep work.
It is also important to protect the areas around your masonry. Cleaning agents and runoff can harm plants, stain decks, or damage window frames. An established company will always take the time to cover these surfaces. You can do the same by:
- Using plastic sheeting to cover nearby landscaping, doors, and windows.
- Spreading tarps on the ground to catch runoff and debris.
This preparation not only protects your property but also makes cleanup much easier once the job is done. It is a simple step that ensures the only thing that changes is the clean appearance of your masonry.
5. Wetting Masonry Surfaces to Prevent Absorption of Cleaning Agents
One of the most important best practices in masonry cleaning is to wet the surface before applying any type of cleaner. Creating a thoroughly prewetted surface with clean water helps prevent the cleaning agent from being absorbed deep into the porous brick or stone. This is especially important for new and historic masonry alike.
When the surface is saturated with water, the cleaning agent stays on the exterior where it can work on the dirt and grime. If the wall is dry, porous materials will soak up the cleaner, which can lead to discoloration, streaks, or even long-term damage. It can also make the rinsing process much more difficult.
Use a garden hose with a gentle spray to wet the wall, working from the top down. Make sure the entire area you plan to clean is visibly wet but not dripping excessively. You do not need a specific amount, like a gallon of water, but just enough to ensure good saturation.
6. Applying Gentle Cleaning Solutions—Household or Specialized Products
When it is time to apply a cleaning solution, gentler is always better. For light, general cleaning, a simple mix of household detergent and water can be effective. However, for more specific stains or sensitive materials, specially formulated masonry cleaning products are the safest choice. These products are designed to be effective without harming the material.
Always read the product literature and follow the manufacturer’s instructions carefully. This includes directions on dilution, application, and how long the solution should sit on the surface, also known as “dwell time.” Never assume that a stronger mixture will work better; it often just increases the risk of damage.
Before applying any cleaning solution to a large area, test it on an inconspicuous spot. This helps you confirm that it will not cause any discoloration or adverse effects. Whether using a household cleaner or a specialized product, this test patch is your best insurance against unwanted surprises.
7. Scrubbing Brickwork with Soft-Bristle Brushes to Avoid Damage
To safely clean brick and other masonry without causing damage, the tool you use to scrub is just as important as the cleaner. Avoid using metal wire brushes at all costs. They are far too abrasive and can scratch the face of the brick, damage mortar joints, and leave behind tiny metal particles that will rust and create new stains.
Instead, opt for a masonry washing brush with soft, natural, or synthetic bristles. This type of brush provides enough friction to lift away dirt, grime, and fresh mortar smears or grout smears without harming the underlying surface. Gentle, circular scrubbing motions are often most effective.
The goal of scrubbing is to agitate the dirt that has been loosened by the cleaning solution, not to scour the surface itself. Proper scrubbing helps lift away years of buildup and can restore the original color depth of your masonry. This careful approach ensures a clean finish while preserving the integrity of the material.
8. Rinsing Masonry Thoroughly with Low-Pressure Water
After scrubbing, a thorough rinse is essential to remove all traces of the cleaning solution and loosened dirt. The key to safe rinsing is using low pressure. High-pressure water can erode soft brick and mortar joints, forcing water deep into the wall and potentially leading to efflorescence, which is a white, powdery deposit.
The best tool for this step is often a standard garden hose with a spray nozzle. This provides enough flow for effective water cleaning without the risk of damage associated with power washers. If you do use a pressure washer, keep it on the lowest possible setting and hold the nozzle at a safe distance from the wall.
Start rinsing from the top of the wall and work your way down. This prevents dirty water from running over areas you have already cleaned. Continue rinsing with lots of clean water until you are confident that all the cleaner has been washed away, leaving a fresh, uniform surface behind.
9. Tackling Biological Growth: Safely Removing Mold, Mildew, and Algae
Shady or damp areas of masonry can be prone to biological growth, such as mold, mildew, and algae. These organisms not only look unsightly but can also hold moisture against the surface, potentially causing damage over time. Simple water and detergent are often not enough for the complete removal of these stains.
For this job, you will likely need a specialized cleaning product designed to kill biological growth. These cleaners are often recommended as part of a chemical cleaning process. When selecting a product, look for one that is specifically labeled for use on masonry and for removing mold or algae. Some effective options include:
- Oxygen-based bleach solutions.
- Proprietary biocidal cleaners.
- Diluted chlorine bleach solutions (use with extreme caution and test first).
Always follow the manufacturer’s safety and application instructions. After allowing the product to work, you will typically scrub the area and then rinse it thoroughly to remove both the cleaner and the dead organic matter.
10. Cleaning Atmospheric Soiling and Pollution Residues
Masonry surfaces, especially in urban or industrial areas, can accumulate a dark layer of atmospheric soiling over time. This grime is a combination of dirt, soot, and pollution residues that bond to the surface. This type of buildup can be stubborn and may not come off with just soap and water.
Effective methods for cleaning this kind of soiling often involve a dedicated cleaning agent. These cleaners work as surfactants, helping to dissolve the grime and lift it from the masonry so it can be rinsed away. Depending on the severity, a light chemical cleaning approach may be the most efficient way to restore the wall’s appearance.
As with any cleaning project, start with the gentlest possible cleaner and method. Always pre-wet the surface before applying the cleaning agent and test it on a small area first. Proper application and a thorough rinse are key to achieving a uniform, clean finish without altering the masonry’s texture or color.
11. Addressing Tough Stains with Stain-Specific Cleaners
Some stains, like rust, copper runoff, or oil, will not respond to general-purpose cleaners. For these tough spots, you will need to use stain-specific cleaners. These products are formulated to chemically break down a particular type of stain without damaging the masonry itself. For example, new metallic stains from steel or copper require a different cleaner than organic stains from leaves or berries.
The process for removal of stains usually involves applying the cleaner directly to the spot, letting it dwell, and then rinsing. Some powerful cleaners, particularly acidic ones, may require the application of a neutralizing solution afterward. This step is crucial to stop the chemical reaction and prevent long-term damage to the masonry.
When looking for the safest cleaning products, choose those specifically designed for your type of masonry and the specific stain you are treating. Always read the label and follow the directions precisely. A small test patch is especially important when using these stronger, targeted cleaners.
12. Cleaning Concrete Masonry Units: Tips for Best Results
Cleaning concrete masonry (CMU) requires specific techniques because different finishes react differently to cleaning. For example, a split-faced block has a rough texture that hides dirt well, while a ground-faced unit has a smooth, polished surface that is more delicate. Using the wrong water pressure or cleaning solution can alter the appearance or damage the unit.
The key is to match the cleaning method to the CMU type. Aggressive methods like sandblasting should be avoided on smooth or polished units but may be acceptable on textured surfaces if done carefully. Always use the lowest effective water pressure and a cleaning solution recommended for concrete masonry.
The table below offers general guidance for cleaning different types of concrete masonry units. Remember to always test your method on a small sample area first.
| CMU Finish | Recommended Cleaning Technique |
|---|---|
| Split-Faced | Low-pressure water, soft-bristle brush. More forgiving of light abrasive methods if needed. |
| Ground-Faced (Honed) | Hand-washing with mild detergent. Avoid abrasives or high pressure to protect the polished surface. |
| Conventional (Smooth) | Scrubbing with detergent. Aggressive cleaning can expose aggregate, so consistency is key. |
| Glazed | Easily cleaned with mild detergent and water due to its non-porous surface. |
13. Special Considerations for Cleaning Historic Masonry
Cleaning historic masonry requires the utmost care and a gentle approach to preserve its integrity. Older bricks and mortars are often much softer and more porous than modern materials, making them highly susceptible to damage from harsh chemicals or high-pressure water. The goal is to clean the surface without removing any of the original material.
Taking special precautions is non-negotiable. Before any work begins, it is critical to perform tests on small, out-of-the-way test panels. This allows you to observe the effects of a cleaning method before applying it to the entire building. The gentlest possible method, such as low-pressure water and a soft brush, should always be the first choice.
Given the risks, cleaning historic masonry is often a job best left to professionals. Field service experts or a specialized Masonry Contractor will have the knowledge to identify the materials and select the safest, most effective cleaning process. Their expertise helps ensure the building’s historical character is preserved for future generations.
14. Cleaning Newly Constructed Masonry: What to Do and What to Avoid
Cleaning new masonry construction is typically done to remove mortar smears and construction site dirt. While it may seem straightforward, this is a delicate stage, and improper cleaning can cause permanent damage. The mortar joints need time to cure fully, so cleaning too soon can weaken them.
One of the most important best practices is to follow the manufacturer’s instructions for any cleaning products used. The product literature will provide specific details on dilution, application, and safety. Always pre-wet the wall thoroughly before applying any cleaner to prevent it from soaking in and causing stains.
To ensure the best results and avoid common pitfalls, keep the following points in mind:
- Do let the mortar cure for at least 7 to 14 days before cleaning.
- Do use the gentlest method possible, starting with a brush and water.
- Avoid using raw acids like muriatic acid, as they can etch the masonry and cause discoloration.
- Avoid high-pressure washing, which can damage fresh mortar joints.
15. Common Mistakes to Avoid When Cleaning Masonry Surfaces
Knowing what not to do is just as important as knowing what to do. Many homeowners make common mistakes when cleaning masonry that can lead to permanent damage, discoloration, or recurring issues like efflorescence. Avoiding these pitfalls will help you achieve a beautiful, lasting result without costly regrets.
One of the biggest errors is using too much force. Many people immediately turn to high pressure washing, thinking it is the fastest way to get the job done. However, this is one of the quickest ways to damage brick and mortar. Similarly, choosing the wrong masonry cleaners can be just as harmful.
To protect your home, be sure to avoid these common mistakes:
- Using high pressure water, which can erode the masonry surface.
- Scrubbing with a wire brush, which scratches brick and can cause rust stains.
- Using raw or undiluted acids, which can dissolve the cement paste in mortar and brick.
- Not rinsing thoroughly, which can leave cleaner residue and cause new stains.
16. How Often Should You Clean Masonry for Lasting Beauty
There is no single answer for how often masonry should be cleaned, as it depends on your local environment and the building’s exposure to contaminants. A home in a wooded, damp area may need cleaning every few years to manage biological growth, while a home in a dry, clean climate may go a decade or more without needing attention.
A good rule of thumb is to inspect your masonry annually. Look for signs of dirt buildup, atmospheric soiling, or biological growth. When you notice the surface looking dull or stained, it may be time for a gentle cleaning. Routine masonry cleaning helps maintain the uniformity of brick and prevents grime from becoming deeply embedded.
When you do decide to clean, pay attention to the conditions. Avoid cleaning on very hot, sunny days, as high masonry surface temperatures can cause the cleaning product to evaporate too quickly, leaving streaks. An overcast, mild day is ideal for achieving the best results.
Conclusion
In conclusion, maintaining the beauty and integrity of your masonry surfaces is essential for any homeowner. utilizing the essential techniques outlined in this guide—from inspecting for damage to choosing the right cleaning methods—you can ensure that your masonry not only looks great but also lasts for years to come. Remember, proper cleaning not only enhances curb appeal but also protects your investment. If you’re ready to get started or have more questions, feel free to reach out for a consultation. Your home deserves the best care, and with the right approach, you can achieve that!
Frequently Asked Questions
What are the safest cleaning products for masonry surfaces?
The safest options are pH-neutral detergents or proprietary masonry cleaning products designed for your specific type of brick or stone. Always dilute the cleaning solution according to the manufacturer’s instructions. If you are unsure, contact the manufacturer’s customer service for a recommendation to ensure you are using a safe product.
Can I use household cleaners on brick and stone?
Yes, for light dirt, mild household cleaners like dish soap mixed with water can be used. However, for natural stone surfaces or tougher stains, specialized products are recommended. Always test any cleaning method on a small, hidden area first and check the product literature for compatibility with your masonry type.
What steps should I follow for professional-grade masonry cleaning at home?
For professional results, follow this cleaning method: inspect for damage, protect your surroundings, and wear protective clothing. Pre-wet the wall, apply a suitable cleaner with a masonry washing brush, scrub gently, and rinse thoroughly from top to bottom using low water pressure to avoid damaging the surface.